Kayak fishing has one big advantage: you can get where motorboats and dinghies simply do not fit. Shallow lakes, narrow river bends, reed-lined margins. But there is also one challenge every kayak angler faces: you sit low by the water and cannot see what is happening under your kayak. The bottom, structure, where the fish are holding: all of it stays invisible.
This is where a fish finder becomes not a luxury accessory but a real working tool. With the right fish finder, kayak fishing changes fundamentally: you no longer fish blind, but see where the bottom structure is, where the fish are holding, where it gets deeper and shallower. In this guide we cover in detail which fish finder to choose for a kayak, which technologies exist, how to mount everything and which mistakes to avoid. Whether you fish Lithuanian lakes or the Curonian Lagoon, the principles are the same.
Fish finder technologies: what each type shows
There are several different fish finder technologies on the market, and each shows different information. Before you buy, you need to understand what you will get for your money.
CHIRP sonar: the standard that is enough for most
CHIRP (Compressed High-Intensity Radiated Pulse) sonar sends not a single frequency but a wide spread of frequencies in one pulse. The result is a clearer picture, better target separation and less clutter on screen than old single-frequency fish finders. In practice this means you see the bottom, vegetation and fish arches more clearly on screen.
For a kayak, CHIRP is the minimum standard worth starting from. Even the cheapest versions of this technology (called "traditional CHIRP") show enough information for everyday fishing. If your budget is limited, a CHIRP fish finder with a 5-inch screen will be a great first choice that you will not regret.
The most popular brands among kayak anglers: Garmin (Striker, Echomap series), Lowrance (Hook series), Humminbird (Helix series). All offer quality CHIRP models in various price ranges.
Side Imaging: see what is happening on both sides
Side Imaging (or SideVu, StructureScan, depending on the manufacturer) sends a narrow ultrasound beam out to the sides of the kayak. On screen you see an almost photographic picture of what is to your left and right. Sunken trees, rock piles, holes, changes in bottom structure, even individual fish: everything is clearly visible.
For a kayak this technology is especially useful for one reason: you move slowly. And slow speed means better Side Imaging picture quality. When fishing lakes with lots of structure, such as sunken trees or rock fields, Side Imaging saves hours you would otherwise spend guessing where the promising spots are.
The downside is that Side Imaging fish finders cost considerably more and use more battery power. But if you fish seriously and regularly, this investment pays off faster than you expect.
Forward Facing sonar: a real-time view underwater
Forward Facing sonar (Garmin LiveScope, Lowrance ActiveTarget, Humminbird MEGA Live) is the newest and most expensive technology. It shows a real-time view in front of the kayak or directly beneath it. You see how the fish move and how they react to your lure: a completely different level of fishing.
Is it needed on a kayak? Honestly, it is a premium technology that costs as much as or more than the kayak itself. For professional anglers who compete in tournaments, it gives a huge advantage. For a hobby angler fishing Lithuanian lakes at weekends, CHIRP with Side Imaging will be more than enough for many years.
Screen size: what suits a kayak
Space on a kayak is tight, so screen size is a compromise between visibility and convenience. The main options:
5-inch screen compact, light and the cheapest option. Enough for reading CHIRP, but Side Imaging details are already hard to read. Suits hobby anglers and anyone who wants to keep the kayak as light and simple as possible.
7-inch screen the most popular choice among kayak anglers, and for good reason. Big enough to see Side Imaging details, but it does not take up too much space or weigh the kayak down. If you are choosing your first fish finder, start with 7 inches and you will not go wrong.
9 inches and more large, heavier and more expensive. If you fish tournaments or simply like to see everything in detail and budget is no object, 9 inches is definitely worth it. But think about the weight and the mounting spot on the kayak: not every kayak has suitable space for it.
Important: screen brightness (measured in nits) is more important than resolution. On a kayak you sit under the open sky, so the fish finder must be readable in direct sunlight. Look for at least 800 nits of brightness, otherwise you will not see anything on a sunny day.
GPS and maps: is it worth the investment
A fish finder with built-in GPS lets you mark promising spots (waypoints), see your track and use bathymetric maps. You can find maps of Lithuanian waters on the Navionics platform, which covers quite a few of our lakes and rivers.
The GPS function is especially useful on large bodies of water. When you find good structure or a hole, you mark the point and next time return to exactly the same place. Without GPS you would have to navigate by landmarks on shore, which is rarely precise enough, especially if you fish open water far from shore.
The price difference between a fish finder with and without GPS is usually 50 to 100 euros. It is one of the best investments you can make when choosing a kayak fish finder. Our recommendation: choose one with GPS if your budget allows.
How to mount a fish finder on a kayak
Mounting is where many people make mistakes. A fish finder has two main parts that need mounting: the transducer and the screen. Each is mounted differently.
Transducer mounting methods
The transducer is the part of the fish finder that sends the ultrasound signal into the water and receives its echo. The picture quality on screen depends directly on how it is mounted.
Suction cup mounting the simplest method, especially if you do not want to drill the kayak. A transducer with a suction cup attaches to the inside of the hull, usually in the scupper well of a sit-on-top kayak. The advantage: it is quick to mount and remove, with no modifications needed. The drawback: the suction cup can come loose in waves, and the picture quality is sometimes worse than with other methods.
Transom mounting the transducer attaches to a dedicated transom mount at the back of the kayak. Many fishing kayaks, such as Galaxy Kayaks or NuCanoe models, have a spot for this or one can be fitted easily. This method gives good picture quality and is reliable enough even in waves. If there is no transom, the transducer can be lowered with the YakAttack SwitchBlade transducer deployment arm, which you can raise at any time without getting up from the seat.
Through-hull mounting the transducer is mounted through the kayak hull with a special glued-in holder. It gives the best picture quality, but requires precise installation and modifying the kayak. If you have a sit-on-top kayak with a flat bottom area, this is the best choice for long-term use.
Mounting the screen on the kayak
The screen should be mounted on the kayak so it is easy to see while fishing, but does not get in the way of paddling or take space from rods or other gear.
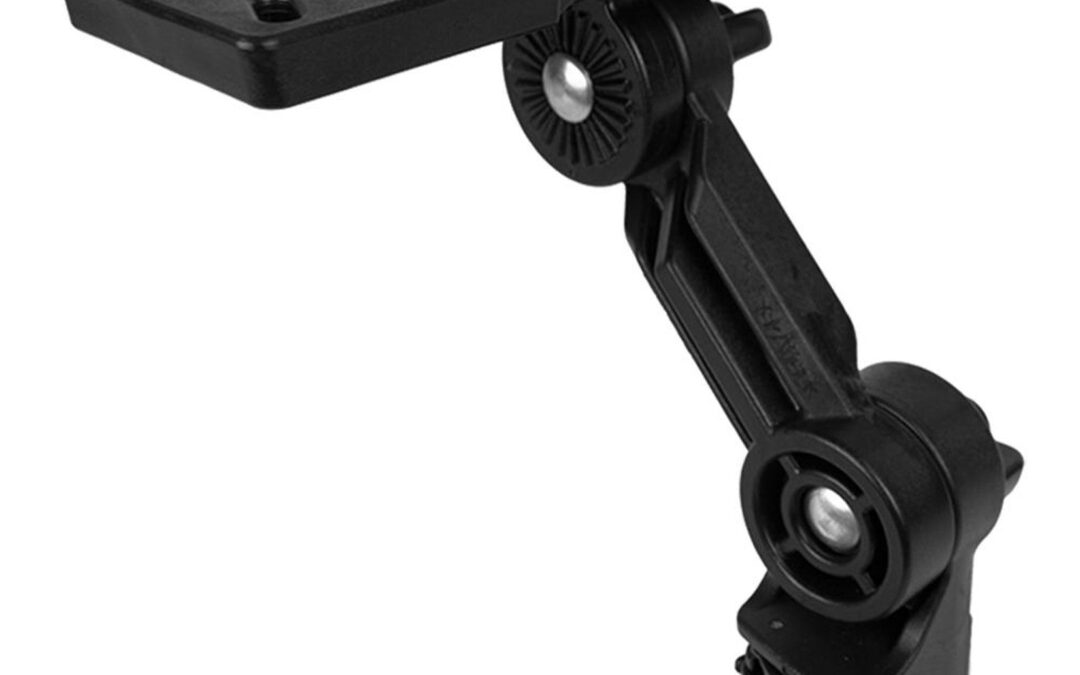
The most popular and best-tested solution is the Railblaza StarPort mounting system. It lets you connect and disconnect the fish finder mount with one hand movement, which is handy when you need to remove the fish finder quickly to transport the kayak. You can use a Railblaza laikiklį as the base for a fish finder platform. The same job on a track is done by the YakAttack LockNLoad fish finder screen mount. You will find more Railblaza mounts in the mounts category.
Another popular option is universal RAM Mount-style holders with a ball joint. They let you adjust the screen's angle and position, which is handy in different conditions. You will find more detailed information on mounting accessories in our accessory mounting guide.
Power: which battery a fish finder needs
A fish finder on a kayak needs a self-contained power source: there is no engine alternator charging the battery as on a motorboat. Here you have two main options.
Lead-acid (AGM) battery (12V, 7 to 9 Ah) is the cheapest option. It costs 20 to 40 euros and weighs about 2.5 kg. It is enough for 6 to 10 hours with a standard CHIRP fish finder. The downsides: it is heavier, needs regular charging after every trip, and cannot be fully discharged without harming its lifespan.
Lithium (LiFePO4) battery lighter (about 0.8 to 1 kg for a 12V 6Ah version), long-lasting (2,000 or more charge cycles), and can be discharged almost completely without damage. It costs 80 to 150 euros, but lasts several times longer than a lead-acid battery.
On a kayak every kilogram counts, so a lithium battery is clearly the better long-term investment. A 6 Ah lithium battery will last a whole day with a standard CHIRP fish finder. If you use Side Imaging, which uses more power, plan for 10 Ah or more if you intend to fish all day.
Important: always keep the battery in a waterproof case. YakAttack BlackPak Pro box is great for storing the battery, cables and other electronics safely on the kayak: everything neat, dry and not shifting around.
If you are interested in electric kayak motors, which also use batteries and have their own specifics, read our electric motor guide.
Practical tips for beginners
Before you buy an expensive fish finder, pay attention to a few things that will save you both money and nerves.
Start simple. A 5 to 7-inch CHIRP fish finder with GPS is more than enough to start with. Once you understand what you are missing, you can move up to Side Imaging or a bigger screen. Many anglers who start with a basic model use it for more than one season and are completely satisfied.
Learn to read the picture. A fish finder shows a lot of information on screen, but you need to learn to interpret it. Bottom hardness, vegetation types, the size and depth of fish arches, thermoclines: it all looks like colored dots and lines until you start to understand what you are seeing. The best school is practice on the water, but YouTube is full of good video lessons for specific fish finder models.
Move slowly. When fishing from a kayak you have a huge advantage over motorboats: you can move slowly and quietly. Use it. Paddling slowly (2 to 4 km/h) gives the best fish finder picture, especially with Side Imaging. At higher speeds the picture blurs and you miss small details.
Do not forget transport. The fish finder and battery add weight to the kayak. If you carry the kayak on a car roof, store the fish finder separately. In our kayak transport guide you will find more tips on this.
And if you are still choosing a fishing kayak, read our 2026 fishing kayak review and rigging guide, which will help you set up a kayak for fishing from scratch.
FAQ: fish finder on a kayak
Which fish finder suits a kayak?
A compact CHIRP fish finder with a 5 to 7-inch screen and built-in GPS suits a kayak best. The most popular choices among kayak anglers: Garmin Striker Vivid 5cv or 7cv, Lowrance Hook Reveal 5 or 7, Humminbird Helix 5 or 7. If your budget allows and you want to see bottom structure to the sides, choose a model with Side Imaging technology. It is important that the fish finder has a bright screen (800 nits or more) and is waterproof to the IPX7 standard.
How much does a kayak fish finder cost?
A basic CHIRP fish finder with a 5-inch screen costs from 150 to 250 euros. A 7-inch CHIRP with GPS is 300 to 500 euros. A model with Side Imaging is 500 to 900 euros. Forward Facing sonar (LiveScope, ActiveTarget) is 1,500 to 3,000 euros or more for the transducer alone. On top of the fish finder price you need to add a battery (20 to 150 euros), a mount (30 to 80 euros) and cables. The realistic starting price with everything is roughly 250 to 400 euros for a basic setup.
Can a fish finder be mounted on an inflatable kayak?
Yes, but with some limitations. For an inflatable kayak, a transducer with a suction cup attached to the inside of the floor works best. Another option is a castable fish finder (for example the Garmin Striker Cast), which you cast out on your fishing line. The picture quality will be worse than on a hard-shell kayak, and the mounting options are more limited. Hard-shell fishing kayaks, such as Bonafide or Galaxy Kayaks models, will always be better for mounting a fish finder.
Which battery does a kayak fish finder need?
For a standard CHIRP fish finder, a 12V 7Ah battery is enough, giving 8 to 12 hours of run time. We recommend a LiFePO4 (lithium) battery, as it is lighter (about 0.8 to 1 kg), lasts longer (2,000 or more cycles) and can be fully discharged without damage. A lead-acid (AGM) battery is cheaper, but weighs 2 to 3 times more and has a shorter service life. If you use Side Imaging, plan for 10 Ah or more, as this technology uses considerably more power.
Read also
- Fish finders and fishing electronics for kayaks: what you need to know
- TOP 10 kayak modifications for fishing: from holders to electronics
- The best fishing kayak in Lithuania 2026: the complete guide
Recommended products
The most popular products in this category