Railblaza, YakAttack and other accessory makers offer dozens of accessories for kayaks and SUP boards. But how do you mount them? Do you need to drill holes? Can they be attached without damage? In this guide we cover the main mounting systems and show you how to mount each accessory properly.
The Railblaza StarPort system: how it works
The Railblaza StarPort is a universal mounting base. It is a small round socket mounted on the surface of a kayak or SUP. Any Railblaza accessory can be slotted into it: a rod holder, a flag, a camera, a light, a phone or a bottle holder. One StarPort, many possibilities.
Installation is simple. Mark the spot, drill the holes using the template (included in the kit), fasten with bolts from underneath and seal with marine sealant. The whole process takes 15 to 20 minutes per StarPort.
If you do not want to drill, Railblaza offers adhesive options (RailMount with a 3M VHB adhesive base) and clip-on TracMounts that attach to Track Rail tracks. For inflatable SUP boards there are dedicated E Series mounts that are glued to the board's surface with no drilling at all.
Rod holder installation
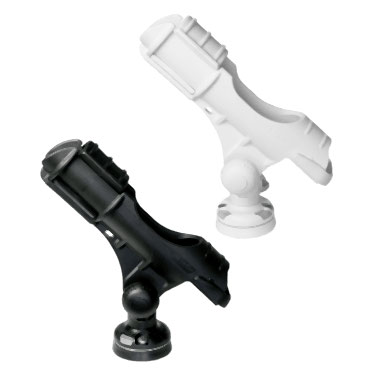
Rod holders are the most commonly mounted accessory on fishing kayaks. The Railblaza Rod Holder II slots into a StarPort with one push and can be removed just as quickly. YakAttack Omega Pro attaches to the Track Rail system, and the base itself is provided by the LockNLoad rail base.
The best spots for rod holders: two behind the seat (for carrying rods and trolling) and one at the front to the side (for active fishing). Before mounting, sit in the kayak and check that you can easily reach each holder without getting up.
Important: mount rod holders so the rods do not cross each other or get in the way of paddling. Check this before drilling any holes, simply by holding the holders in the planned spots with the rods in them.
Navigation lights
If you paddle at dusk or in the dark, navigation lights are required by inland waterway rules. A kayak needs at least one white light visible from all directions.
The Railblaza Illuminate series offers several options. The Visibility Kit is a compact white light on a flexible pole that slots into a StarPort. It is visible from 2 nautical miles and meets COLREG requirements. The NaviPack is a full navigation light kit with a red-green front light and a white rear light.
Installation is simple: slot the light pole into the StarPort socket. The recommended spot is at the back of the kayak, as high as possible, so the light is visible from all directions. If you use the NaviPack, mount the front light on a front StarPort.
Camera and phone mounts
Want to film your fishing or paddling? The Railblaza Camera Mount Adaptor attaches a GoPro or another action camera to any StarPort. You can point the camera forward, at yourself or at the water. The Railblaza MobiMount holds your phone securely and lets you use it for navigation or as a fish finder screen (some fish finder apps work through a phone).
The best camera spot is at the front, pointing at the paddler or forward. Keep your phone next to the seat where you can easily see the screen. Use a safety leash that tethers the device to the kayak. Even with the best mount, it is better to have a backup.
SUP board accessories
Inflatable SUP boards can also use the Railblaza accessory system. E Series adhesive mounts are made specifically for PVC surfaces and hold firm even when the board flexes. On a SUP board you can mount a rod holder (yes, you can fish from a SUP), a bottle holder, a camera or a phone.
Mounting on a SUP: clean the surface with isopropyl alcohol, remove the protective film from the adhesive side, press the mount down and wait 24 hours before use. The temperature must be at least 15 degrees when gluing. This time is needed for the adhesive to cure fully.
Installation tips and common mistakes
Always use marine sealant when drilling holes in a plastic kayak hull. It stops water getting in. A UV-resistant polyurethane sealant (such as Sikaflex 291) is the ideal choice.
Check the inside before drilling. Many kayaks have internal bulkheads, cable channels or reinforcements. Do not drill through them. If possible, look through an inspection hatch or shine a flashlight through a drain hole.
Start with a few accessories and add more as needed. Too many accessories at once make the kayak heavier, reduce stability and get in the way of paddling. 2 to 3 main accessories for the first season is more than enough.
Test on land before you go out. Sit in the kayak in the garage or yard, fit all the accessories and check that everything is within reach, nothing is missing and your paddling stroke is not restricted.
All the Railblaza accessories and mounts mentioned in this article can be found in the VAKA Sport online store. If you are not sure which mounting option suits your kayak or SUP board, get in touch and we will help you choose.
Most popular accessories
A mounting system only works when the base and accessories match.
- RAILBLAZA StarPort a universal base for all accessories
- RAILBLAZA Rod Holder R a rod holder
- RAILBLAZA Rod Tube protected rod transport
Read also
- Kayak transport and storage: everything you need to know before you buy
- TOP 10 kayak modifications for fishing: from holders to electronics
- Fish finder on a kayak: how to choose, mount and use one (2026)
Frequently asked questions
Can accessories be mounted on a kayak without drilling?
Yes. Railblaza offers adhesive options (with a 3M VHB adhesive base) and clip-on Track Rail options. For SUP boards there is the E Series, glued onto the PVC surface.
Which sealant is right for sealing a kayak hull?
A UV-resistant polyurethane marine sealant such as Sikaflex 291 is the ideal choice. It stops water getting in through drilled holes.
How many Railblaza accessories can be mounted on one kayak?
One StarPort base accepts any Railblaza accessory: a rod holder, a light, a camera, a phone or a bottle. Start with 2 or 3 and expand as needed.
Recommended products
The most popular products in this category