You have decided to start kayaking. Great. But before your first strokes, there are a few things you need to know that will make your first experience a pleasure rather than a stress. This guide covers everything from getting into the kayak to care after the season. Read it, remember the key points and paddle with confidence.
How to get into and out of a kayak
A beginner's first challenge is the simplest action: sitting down in the kayak. Many try to do it standing in the water or jumping in from the shore. Both end up wet.
The right way: place the kayak parallel to the shore so it is in shallow water but floating. Lay the paddle across the kayak behind the seat so that one end rests on the shore. This paddle becomes your support. Grab the paddle shaft and the edge of the kayak with one hand, and support yourself on the shore with the other. Sit on the side, swing your legs in and lower yourself into the seat.
Getting out is the same process in reverse. Paddle up to the shore, use the paddle as a support, stand up on the side and climb out. If there is no shore (a jetty or pontoon situation), use your hands as supports and shift your weight smoothly.
Life vest: not optional
A life vest is mandatory on every outing. Not "when I paddle far from shore". Not "when the water is cold". Always. Even good swimmers can go into shock in cold water, get injured in a capsize or simply get tired.
Choose a vest made for paddling. It has a higher back (it does not get in the way of the seat backrest), a wider shoulder area (it does not restrict your paddling movement) and pockets for small items. VAKA Sport offers Baltic Lifejackets and NRS vestssuited to kayaking and SUP.
The vest must be fitted properly. Fasten all the buckles and adjust the straps so the vest sits firmly but does not squeeze. A check: raise your arms. If the vest rides up and exposes your waist, tighten the side straps more.
What to wear when paddling
The basic rule: dress for the water temperature, not the air. It can be a warm 20-degree spring day, but if the water is still 8 degrees, a capsize can be dangerous. Cold water causes shock within seconds.
In warm weather (water temperature above 18 degrees): light, quick-drying synthetic clothes. Shorts and a T-shirt with UV protection are ideal. Avoid cotton: it takes a long time to dry, chills you and becomes unpleasant. Do not forget a hat, sunglasses (with a retainer so they do not fall in the water) and sunscreen.
In the shoulder season (water temperature 10 to 18 degrees): a wetsuit or dry suit. A windproof jacket on top. Neoprene gloves and socks protect your extremities, which get cold first.
In cold weather (water temperature below 10 degrees): a dry suit is the only safe option, with a thermal layer underneath. Neoprene gloves, socks and a hat. No compromises with cold water. Hypothermia is a real danger.
Turning and maneuvering
A forward stroke pushes the kayak ahead (we described the technique in a separate article). But how do you turn?
Sweep stroke: instead of pulling the paddle in a straight line along the side of the kayak, draw a wide arc from front to back. Paddle on one side and the kayak will turn to the other. It is the simplest way to turn, and you can use it both on the move and when stationary.
Reverse strokes: paddle backward on one side and forward on the other. The kayak will spin on the spot. This is useful in tight spots or when you need to change direction quickly.
Using a rudder and skeg: some kayaks have a rudder or a skeg. A rudder is controlled with foot pedals and helps you hold your course in wind or current. A skeg is simply lowered and helps the kayak go in a straight line, but does not turn it.
What to do if you capsize
Capsizing is normal. It will happen. The most important thing is to know what to do.
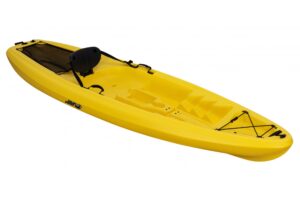
Sit-on-top (open) kayaks cannot sink, and once capsized they flip back over easily. If you capsize, do not panic. Hold on to the kayak, it will float. Flip it back over (hold one side and pull it over toward you). Then climb on from the stern or the side. In shallow water you can simply stand up and get back on.
Sit-inside (enclosed) kayaks take more practice. First you need to get out of the kayak underwater (called a "wet exit"), then flip the kayak over and get back in. We recommend learning this in a controlled environment (a pool or shallow water with an instructor) before paddling in open conditions.
Kayak care
A well-cared-for kayak lasts for decades. The basic rules are simple.
After every outing, rinse the kayak with clean water, especially if you paddled in salty or muddy water. Let it dry completely before storing. Damp encourages mold and an unpleasant smell.
Store the kayak in the shade or under a cover. Long-term UV exposure fades the color and weakens the plastic. If you have to store it outdoors, use a kayak cover or at least turn it upside down.
In winter, store the kayak horizontally on a rack or hang it with straps. Do not stand it vertically on its bow or stern, as its weight can deform the hull over the winter.
Check metal parts (bolts, fittings, rudder) before every season. Salt water and damp encourage corrosion. Lubricate moving parts with silicone grease.
Tandem paddling: what is different about a two-seat kayak
A tandem (two-seat) kayak is a great choice for couples and families. But it takes teamwork. Not for nothing are tandem kayaks called "divorce boats".
The rear paddler is the captain. They control direction and pace. The front paddler follows the rear paddler's rhythm and adds power. Communication is essential. Agree on who leads before you get into the kayak.
Synchronize your strokes. Both paddlers should put their paddles in at the same time on the same side. The front paddler sets the rhythm and the rear one follows. If you paddle out of sync, the kayak will zigzag and you will both work harder than you need to.
Physical preparation
Paddling is a great workout. It works the upper body, the core and the cardiovascular system. But if you are not in shape, your first trips can be painful.
Start with short outings (1 to 2 hours) and gradually go longer. Warm up your shoulders, back and arms before paddling. After paddling, stretch the same muscles. Regular paddling 2 to 3 times a week for a month makes a noticeable difference in both strength and technique.
Paddling can be both a calm pleasure and a serious workout. Start with the pleasure and let the sporty side come naturally. The most important step is the first one: just get out on the water.
Beginner's kit
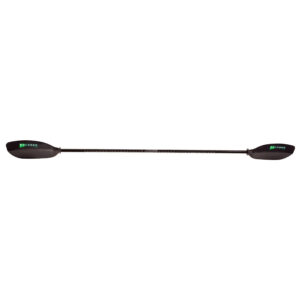
Learning to paddle is easier when your gear does not get in the way. You can start with the paddle that came in the set, but a lighter kayak paddle makes a difference after the very first hour.
- Braca-Sport Hurricane 60 irklas light, less tiring for your arms
- Baltic Pro Sailor 100N liemenė
- NRS DriDuffel dry bag
Read also
- Paddling tourism by kayak: how to plan a trip on Lithuanian rivers
- Where to kayak in Lithuania: the best places and routes
- How to get back into a kayak after capsizing: self-rescue technique (2026)
Frequently asked questions
How do you get into a kayak correctly?
Place the kayak parallel to the shore in shallow water. Lay the paddle across behind the seat as a support. Sit on the side, swing your legs in and lower yourself into the seat.
What should you do if you capsize in a kayak?
Do not panic and hold on to the kayak. Flip a sit-on-top kayak back over by holding the side, and climb on from the stern or the side. For sit-inside kayaks you need to know the wet exit technique.
How should you store a kayak in winter?
Horizontally on a rack, or hang it with straps. Do not stand it vertically, as its weight can deform the hull. Keep it in the shade and check the metal parts before the new season.
Recommended products
The most popular products in this category